

How To Set Up Obs Recording
Let's talk near how to set up OBS for recording – then y'all can create the most professional person-looking videos possible without a ton of actress work. In this commodity, we'll walk you through how to commencement recording with OBS, the tiptop settings y'all'll want to employ, and the best alternative screen recorders bachelor today. Allow's get started!
How to get best-quality screen recording videos in OBS Studio
To go started, let'southward discuss a few ways to learn how to optimize OBS for recording on your computer.
Balance your settings
Outset, you'll demand to balance your settings. To do this, select the File menu and click Settings. This will open up a new window. In that window, you'll see options for:
- General
- Stream
- Output
- Audio
- Video
- Hotkeys
- Advanced
The first time you open OBS Studio, an auto-configuration tool should pop up and guide you through the process of setting upwards OBS for your auto's capabilities. If whatsoever settings aren't adjusted, or if you demand to increase OBS recording quality, you can come back to the Settings carte to brand adjustments.
Set video capture parameters
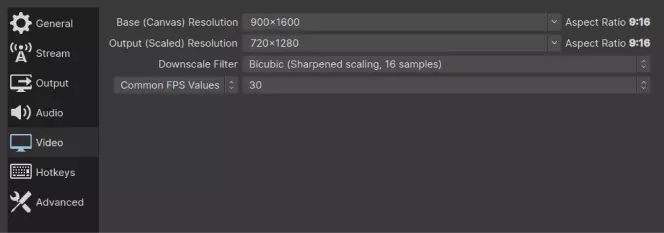
Whether you're a new OBS user or a veteran, you tin adjust the video settings to capture better quality videos past clicking on the Video option in the Settings window. When you click here, yous'll see options for Base of operations (Canvas) Resolution, Output (Scaled) Resolution, Downscale Filter, and Mutual FPS Values.
The Base (Canvas) Resolution refers to the dimensions of the window or surface area that y'all'll be capturing for your video. The numbers y'all meet hither are the width x height of the video capture. If you're recording your entire screen, for case, and y'all know your monitor is 1920 × 1080, yous'll select this option. If you're capturing a custom-sized window, you can enter the width and pinnacle manually.
Output (Scaled) Resolution refers to the resolution of your output video. You can make it the same as your canvas resolution, only you'll likely desire to change it to best fit your output file format or the platform you'll be streaming or where you'll upload your video on.
Common FPS (frames-per-2d) refers to your frame rate. Check now to brand sure that you have it set to the frame rate you want your final video to take. xxx frames per second is ordinarily a proficient way to go here, but it's upward to y'all.

Set your video recording parameters
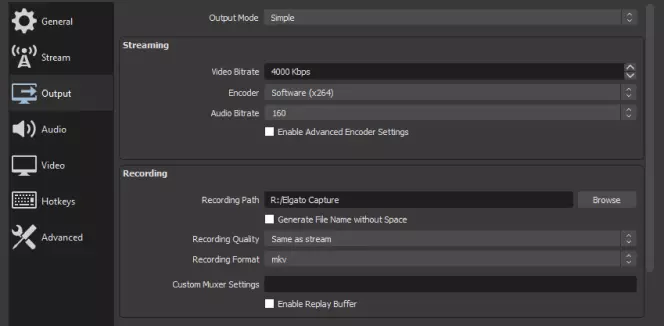
Adjacent, click Output in the Settings window. At the height of the window, you tin choose betwixt Elementary and Avant-garde for your output mode. Simple fashion lets you lot choose your video bitrate, encoder, audio bitrate, recording path (the name of your file and where it's saved), recording quality, recording format, and custom muxer settings.
For most people, elementary mode gives plenty options and makes the process easier and faster. If y'all want to use the advanced mode, yous'll notice three tabs: Streaming, Recording, and Audio. Get-go with the Recording tab to choose your recording path and to change your file format if you want. Here, you tin choose to record your video as an MP4, and yous can set your encoder, equally well. If you lot're streaming, we highly recommend using the stream encoder.
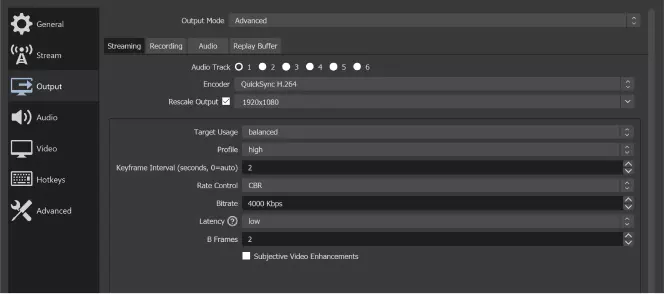
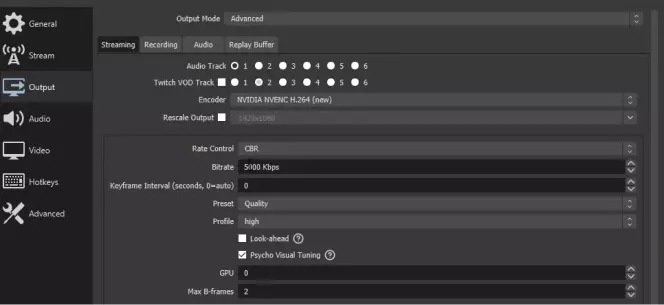
Set streaming parameters for your screen recording
If you're streaming, yous'll want to use the advanced output way to configure OBS for recording. Go to the Streaming tab and make sure that:
- Bitrate is prepare to 12,000
- CPU usage is gear up to ultrafast
- X264 is selected for the encoder
The all-time settings for OBS recording
As you get used to how to employ OBS for recording, it'due south useful to understand all the settings – and then you lot know which are the almost useful and how all-time to use them.
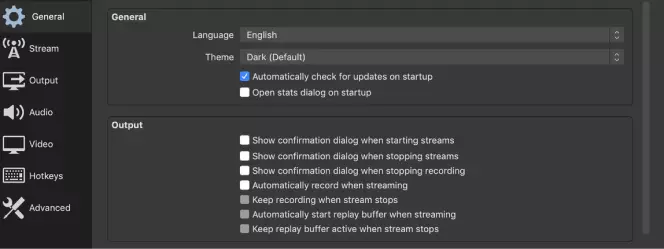
Full general settings
When y'all opened the Settings window, you probably noticed Full general Settings at the top. General settings don't have any real upshot on your video or audio. They're mostly focused on your user experience. Here, you can modify the application theme to dark mode, and you tin can brand a few other changes, like activating the Organisation Tray so you tin easily launch OBS whenever you lot need to.
Output settings
Yous'll find Output Settings next, but below Full general Settings in the Settings window. Your output settings will control the quality and size of the video y'all create with your screen recording and/or webcam recording. You may demand to make adjustments to these settings depending on your purpose for your video. For example, if you're recording conferences or tutorials for internal use past employees at your company, you may not need to produce a high-definition video that takes upwardly a lot of space and processing ability. On the other hand, if you're recording gameplay for games with high-quality animation, you'll want your video to await as crisp and cool every bit possible.
When you click on Output Settings, yous'll see the choice to cull between Unproblematic Mode and Advanced Style at the top of the window. Simple Mode allows y'all to choose the recording path, quality, and format for your video. Avant-garde Mode gives you the option to customize your video output settings for recording, streaming, and audio output settings.
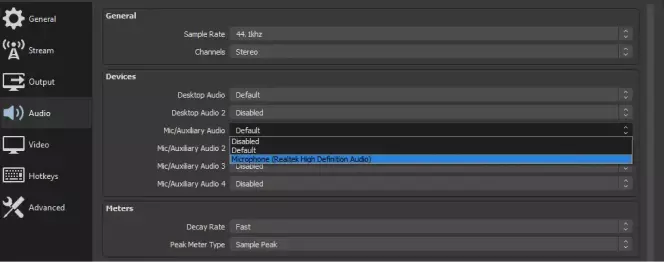
Audio Settings
Below Output Settings, you'll notice Audio Settings. This is where you'll prepare your audio output. If you lot're using your computer'south output audio, yous'll choose a Desktop Audio option. If you're using an external microphone, you lot'll choose one of the four Mic Audio options. Select the correct pick and move on to Video Settings.
Video Settings
When you open Video Settings, make certain that your Base of operations (Canvas) Resolution and Output (Scaled) Resolution are set up to the parameters y'all desire. Think, Base Resolution is where you lot fix the dimensions of the video yous're capturing, and Output Resolution is where you fix the dimensions of the output video file. This is also where you'll set your bitrate (Mutual FPS Values).
Using advanced settings for OBS
Beneath Video Settings, you lot'll find two more settings categories: Hotkeys and Advanced. Hotkeys are just keyboard shortcuts that you can set to streamline the video capture and recording process. In Advanced settings, make sure that your processing priority is set above normal, and set your renderer to Direct3D eleven. To ensure that you have the best-looking video possible with a full range of colors, set your YUV color range to full, code format to NV12, and YUV color space to 709.

How to ready upwardly OBS for streaming
At present, permit's talk about how to use OBS for recording streaming videos, gaming, online conferences, and how to succeed using a low-end computer with less processing power.
How to optimize OBS for recording
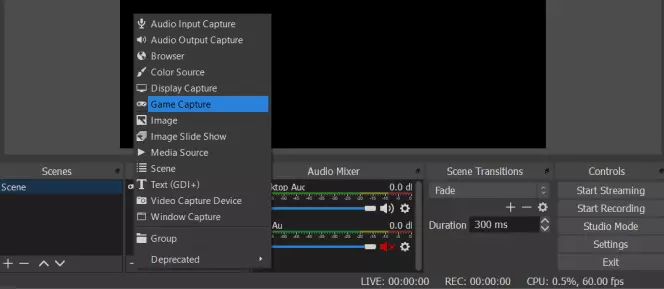
How to set up OBS for game recording
When setting up OBS for gameplay recording, set your video capture settings to Game Capture. If you aren't playing in full-screen mode and you only want to capture the game window, be certain to set your Base of operations (Canvas) Resolution to match the dimensions of your gaming window. If you only want to tape the gameplay sound, you tin set up audio to Desktop Audio. You can also choose from the Mic Audio options if you lot desire to include your narration every bit well.
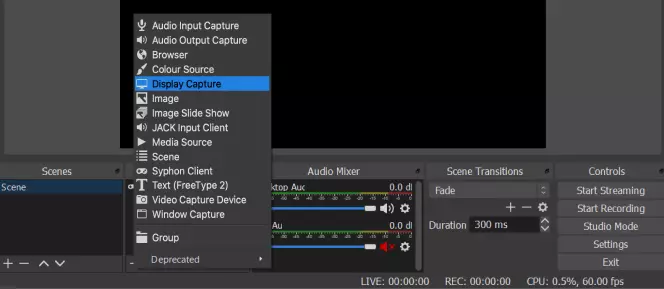
How to prepare up OBS for online conferences and lectures
To record and stream online conferences or lectures, set your video capture to Display Capture and adjust your Base of operations (Canvas) Resolution accordingly. Be certain that your output resolution is set to what you want, and go to Audio Settings. If you're streaming and recording yourself giving a lecture, choose the appropriate Mic Audio to get the best sound for your video prune. If you're recording a speaker giving a lecture in an online conference, choose Desktop Audio.
How to set OBS for low-end or bad computers
When working with a calculator with less processing ability, your goal should be to make the smoothest video possible, and avert lag and get the best quality video possible within the limits of your equipment. To do this, go into your Settings bill of fare and reduce your recording resolution to 16:9, 720p, or 480p. If you're recording gameplay, go into your game's settings and adjust them downwards to a lower resolution too. Essentially, your flick quality may exist a little lower, simply you'll notwithstanding be able to create an enjoyable and/or educational experience for your viewers.
The all-time OBS alternatives for recording and streaming
Now, OBS Studio isn't the simply option available for screen recording and streaming. Let'due south take a expect at a few alternatives that you might want to consider.
Movavi Screen Recorder offers an like shooting fish in a barrel mode to record all or part of your screen for online conferences, lectures, events, and tutorials. Users can easily fix up recording and output parameters, tape both audio and video, and edit captured videos for later on utilize.

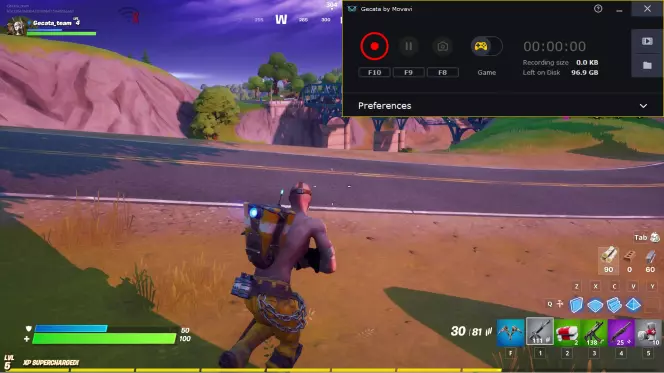
Gecata by Movavi is a free-download application for recording and streaming games. It offers a straightforward and user-friendly solution for gaming streamers who want to capture and stream in-game play. It as well has options to tape with your webcam, likewise, and so yous can create window-in-window videos that evidence your reactions and narration while also showing the game itself. Information technology besides has the capability to capture sound from your desktop and your microphone at the same time.
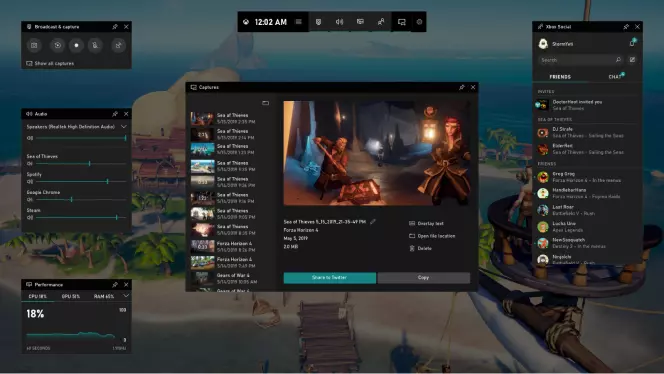
Windows x Game Bar
Windows 10 Game Bar is a built-in default awarding in Windows 10 computers. If you are running an older PC, yous may accept trouble finding and running a compatible version. Information technology as well has some recording and audio limitations, and some users have reported that the video output doesn't always work.
Summary
Setting up OBS to record for streaming, gaming, and video conferences is fairly straightforward. With the tips and tricks we've discussed here, you lot should be able to create quality videos by recording your screen and/or webcam action. If you're looking for a good alternative to OBS Studio that will aid you make loftier-quality videos, we recommend trying out Movavi Screen Recorder or Gecata by Movavi.

Ben is a writer from the UK with qualifications in Media and Music Technology, he specializes in software reviews and tutorials. Ben has been blogging nearly media and tech subjects since he was a teenager from his base in the East of England.


Movavi Screen Recorder
The perfect fashion to record from your screen
Frequently asked questions
How do I set upward OBS for recording?
When you beginning open OBS Studio, you should be prompted to go through the auto-configuration procedure. If the Auto-Configuration Magician tool doesn't automatically pop upward, you tin find it in the Tools menu at the top of your screen. Run this tool to allow OBS automatically check your arrangement'due south requirements and attempt to find the settings appropriate for your computer. This should include the settings for your recording, resolution, encoder, bitrate, and other settings.
Once you've run the auto-config tool, check that OBS is set up for your preferred sound device. You can do this by clicking Settings > Sound. And so verify that it has the right audio device selected or change information technology if you're using some other device.
Next, you'll need to add together your video source(south). Find the Sources box at the bottom of the screen and click +. This will give you several options, including Game Capture, Window, or Video Capture Device (for capturing webcam video). Select the appropriate video source(south), and you'll be set to start recording.
What are the best settings for OBS recording?
For many users, the best settings for OBS recording are:
- Video file format: MP4
- Audio rail: ane
- Encoder: x264
- Bitrate: forty,000 (or fifteen,000-25,000 if yous're working with a lower-end computer)
How practice I set up OBS for recording games?
To record gameplay with OBS, go to Settings > Audio to ensure that your audio output is gear up correctly to your internal computer audio or to an external microphone if you're using one. Next, go to the Sources box at the bottom of the screen. Click + and select Game Capture. This will ensure that y'all record the window for your game and no other video sources.
Why is my OBS recording laggy?
If the video you're capturing isn't lagging, but your OBS recording is, you lot likely need to reduce your bitrate and/or turn down your resolution settings for your game. If the problem persists and you know that your computer is not lagging, you might want to try an alternative video capture application, similar Movavi Screen Recorder.

How To Set Up Obs Recording,
Source: https://www.screencapture.com/blog/best-obs-recording-settings.html
Posted by: noblesbutiefull.blogspot.com
0 Response to "How To Set Up Obs Recording"
Post a Comment